Posting to Instagram from your PC can be confusing for even the most experienced.
Although, with a little help you can start posting your favourite content to Instagram in no time at all.
Instagram is for publishing and sharing content, such as weddings and holidays etc.
We will explain how to post to Instagram from a PC or Mac in this post.
What’s the problem?
If your goal is to capture the attention and interest of thousands of real Instagram followers – you need high quality and engaging photos that connect with your audience and make a big impact on growing your Instagram account.
The problem is that you may have difficulty competing against Instagram influencers who spend a lot of time editing posts and images prior to upload.
They may even spend hours on this part of the editing process.
What’s really going on?
It’s not a secret that many photographers, influencers and businesses use DSLR cameras and edit them on their computers before uploading them to Instagram.
This method means that you can get the most engagement from your posts!

Why you should learn how to use the PC for Instagram uploads
As Instagram places a focus on capturing moments they do not allow you to upload videos and photos to your profiles directly from the desktop PC in a way that is “standard” or easy to do.
This is deliberate – Instagram did this to encourage users to use the app on their mobile.

Is there a way around this?
There are many ways to get around Instagram’s guidelines when you want the perfect content to get visible.
We’re sure you want to get your posts standing out from the crowd.
The editing process
If you edit your images on your PC or Mac before you upload them to Instagram you can spend extra time on the quality of your images to make sure they look great on the web page.
Editing images on Instagram has the following benefits:
- Improved trust
- Authenticity
- Become an authority in your own niche
- Higher engagement
- Grow your potential followers and customers
- Grows your personal brand
Now we have a good idea why learning how to post to Instagram from PC is so important, we can now look at how to use Instagram on PC or Mac.
#1 – Change your browser
By changing your browser agent is one of the easiest ways to upload content to Instagram from a Mac or PC.
You won’t need to download any software, and it is usually free of cost.
However, the only disadvantage to this is that you can’t use this with videos or gallery posts.
The simplest option is to use Google Chrome for posting to Instagram from the PC.
This will work with either a Windows PC or Mac if your goal is to post on Instagram from Mac.
On Chrome, navigate to Instagram and log into your account, then right-click anywhere on the page and choose the Inspect option.

The Inspect option will reveal code on the right side of your screen, including a tiny little icon that looks like a tablet.
When you hover over “Toggle Device Toolbar” a box will appear, click it.

At the top of the page, you will see the search bar.
You should see “Responsive” with an arrow next to it.
If you click this a few different options will appear, for example:
- iPad
- Pixel 2
You may select from any of these options in order to post on Instagram from Mac or PC.

After you have chosen the mobile device you want to test, refresh the page, and you will notice your computer screen is the same size as your mobile, and it also includes an option to add your image.
#2 – Use Safari
Are you a Mac user? If you prefer to use Safari, you can do something similar to the one we discussed above by using the “Preferences” section.

Go to the Instagram homepage from your Safari browser, and log into your account.
Click on the Safari Icon at the top left of the browser, and select “Preferences”

In the preferences tab, select “Show Develop Menu in the Menu bar.”
This will be at the bottom of your preferences list.
When you click on the Develop tab from your menu bar, you’ll see options.
The one you need to be interested in is “User Agent.”
Hover over this, and you will see options like “Internet Explorer”.
hoose the option for “Safari iOS – iPhone.”

Just like with the Chrome workaround above, you should refresh the page to let your browser think it’s now on a smartphone.
Now your Instagram page should suddenly look like it would on a mobile, and your option to add an image should be visible.
#3 – Get A Mobile Emulator
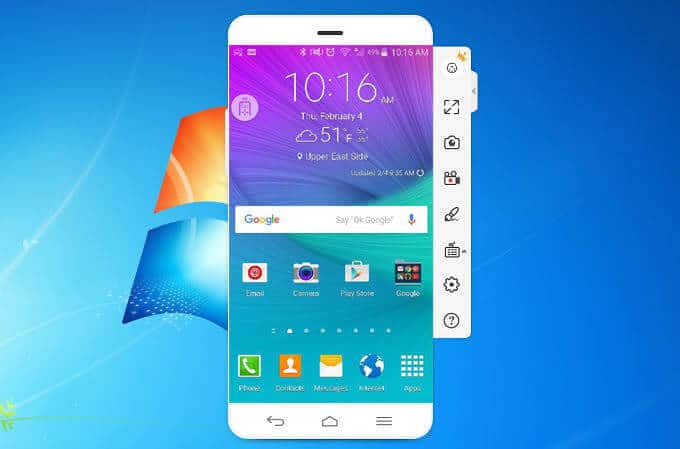
A mobile emulator turns your PC into a mobile compatible platform.
There are a few good third-party software providers of mobile emulators for desktop, one of which is BlueStacks.

BlueStacks is a free Android emulator that can be run on both PCs and Macs.
Head to BlueStacks and download the free software, then install on your computer.
Search for and install Instagram on Bluestacks.
Launch Instagram and sign in.
You will now have the Instagram mobile site running on your PC or Mac.
The great thing about this tool is that it is multi-purpose, meaning that you can run other Android apps from your laptop or PC.
#4 – Try an Instagram bot / scheduling platform
If you are not a fan of changing your browser then we have one option left for you to try out.
Scheduling tools and bots allow you to post directly to Instagram.
This means you don’t need to use your mobile to post.

If you are planning on building a successful Instagram profile, then you should start to schedule your posts and content using a tool or Instagram bot.
A consistent posting schedule helps to build credibility for your brand and keeps your followers engaged and promotes your brand.
A recent API update means that you no longer have to worry too much about your scheduling strategies.
With auto publishing on a scheduler or bot you also don’t have to worry about having unedited images on your Instagram profile and you can schedule your posts for any day or time.


